.svg)
.svg)

Let’s stay in touch with the ShipHero Blog.


.png)
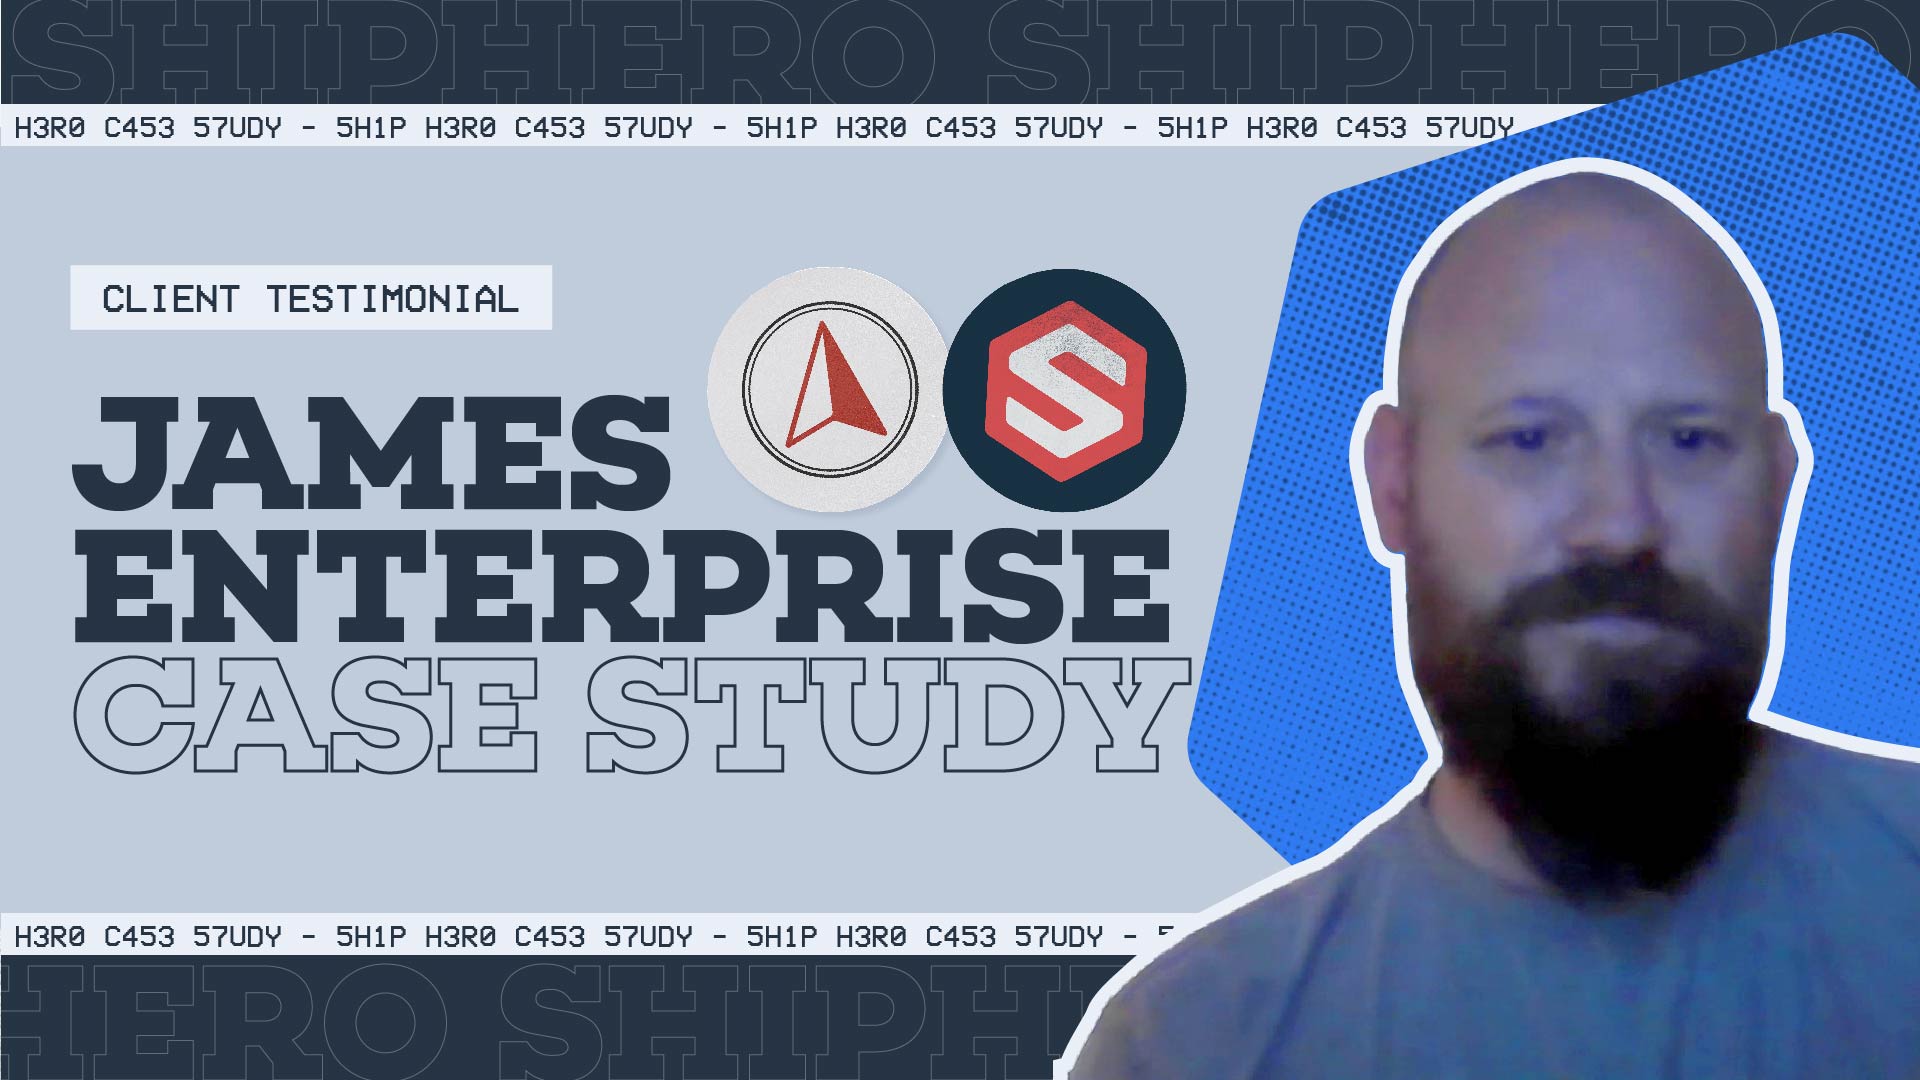
Look at how James Enterprise enhanced its warehouse efficiency with ShipHero WMS! Since implementing ShipHero in 2022, they have reduced pick times from 50 seconds to just 34. ShipHero made the seamless onboarding process, fewer errors, and almost zero downtime possible.
.svg)

Meet the Packer Performance Dashboard, ShipHero’s latest feature that goes beyond simple pack rates.
📦 Tracks key packing events (Tote Scan, Item Scan, Print Label, Order Complete)
📈 Scores efficiency based on expected vs. actual pack time
⚡ Factors in order complexity & shipment type for real-world accuracy
Your warehouse just got smarter. Ready to optimize labor costs?

Have you heard the latest? ShipHero’s Warehouse Management Software has enhanced its cycle count feature. You can now set counts by your schedule, assign users, flag for recounts and choose to count by location or SKU – whatever works best for your brand! We’re so excited to offer this enhanced functionality and give our clients the flexibility and control they need to keep their inventory counts accurate and up-to-date.
.jpg)
If your team spends any time working on special projects, you know that managing them well is a full-time job. Give your warehouse team the tools it needs to make special projects easy by using Work Orders, now available in ShipHero’s WMS. Work orders manages and records every step in the process of special projects, including inventory movements, project progress and time management. We created this feature knowing it could fundamentally help your teams work better and we think you should give it a try!
Hello everyone and welcome to another episode of ShipHero Feature Walkthroughs, I’m joined today by Valerie Cancian, our associate product manager, how are you today, Val?
I’m doing fantastic, how are you today?
I’m good, thanks for asking. So today we will explore Work Orders, correct?
That is correct.
Awesome.
All right, so let’s jump in. So I guess first question is what’s a work order? So Work Orders is a new feature that we’ve come out which is available now in ShipHero. And what it allows is for you to submit a task or a pretty much like a request to build a SKU in this case, like a preassembled kit. So in ShipHero we had something referred to as a kit where you could have this parent SKU and you could assign components, but then when your pickers went out, they’d have to pick each component and then pack each component and then ship it. What we learned is a lot of customers want to preassemble these assemblies, these kits, and have the finished product sitting on a shelf. So it’d have the box and all the components and that would be one SKU. People were doing this outside of ShipHero, they’re deducting inventory and using spreadsheets and all of these different tasks to pretty much accomplish this. And we decided we need to get that into ShipHero. That way all the inventory is tracked, everything is logged. You can submit this request to build a certain SKU. You can track what’s being done, what’s being deducted, what’s being added all within ShipHero, so this feature, Work Orders will allow you to do this. It’ll also allow you to submit other requests in sort of this custom open format or you can just put in some sort of reminder to do a task and again, track your progress on it, which I’m gonna show you how to do all of that. So let’s see on my screen here is this is our Work Orders dashboard.
This shows you the Work Orders that you have to complete. I am here today in a brand account. So this is for those in a brand account, in which case I’m making the Work Orders for my team, for myself, this is to track progress within my warehouse. So you’ll see which ones I have here. You’ll see which warehouse they’re for, what type. So that assembly is creating the kit, we also have custom, which I’ll show you, the date that I wanted this done by, the schedule date. This is internal for where I would like to start working on it, when we create the work order together, I’ll show you how these two dates are really useful. Just a quick overview of the status, how they’re going, the name that you choose. And then you could also see these little actions here when these items were picked, when they were being built and then when it was done. So it gives you a quick overview of all the different tasks, these different requests that you have put in. For filters, we have the order status filter. So as you have some completed or closed Work Orders, if you don’t wanna view those by default, you can hide them here. And then if you want to look into them later, you can view them. This could be exported and you could also hide some of the columns if you’re not interested in the order ID. There you go, it’s gone. But before we jump into creating a Work Order, we are gonna have to create our assembly SKU first. So we’re gonna move over into app.ShipHero over here, which many of you may be familiar with. And we’re gonna go to our inventory page, inventory products, and we’re going to make one of our SKU a assembly SKU. So what this means is we’re going to tell ShipHero which components we want to build this SKU. So for our example here, I’m gonna do a yoga box because I like to do yoga or I pretend that I like to do yoga and this SKU here, we’re gonna pre-build this box. I could make it a kit and have them pick all the components, but I don’t wanna do that.
This is the big seller for my store here. So I’m going to build everything and put it on the shelf complete, so first thing I need to tell ShipHero, hey, I’m gonna be assembling this SKU. So when you go to your details on your SKU page, hit the little edit icon and you will see it says this is an assembly SKU used in Work Orders, very full sentence here. Once you click this, ShipHero now knows this is gonna be an assembly SKU. So a few things to note. An assembly SKU behaves like a regular SKU. It can have a location, it will have it on hand, it can be picked, it can be packed, all of that good stuff. Just to note, an assembly SKU cannot be a kit. The reason being is a kit doesn’t really exist, it’s just its components, so if something is a kit, you won’t have the option to make an assembly SKU. You would have to make it not a kit first pretty much. But once you are done with that, you’ll have assembly SKU components and you will be able to start adding in what you would like for this assembly SKU. So this is yoga themed. I’m gonna have a yoga mat which I had previously added. We’re gonna do a yoga block, which is very useful when you’re not very flexible. You need like some help, yoga strap here. Again, very useful when you’re not super flexible, you can change how many of these.
So generally it’s good to have two yoga blocks for this kit, we are going to update the assembly component quantity to two, all right, so we’re gonna need two of these, a mat and a strap, now you can also, so what’s cool about Work Orders and when you’re making this, in this specific example, these SKUs, I’m also selling individually, which is fine ’cause everything’s in ShipHero. We’re tracking if the yoga block is being sold on an order, we know that. And then the stuff being used for this Work Order, you’ll see we’re gonna hold that aside. But you also can make your components like materials. A common use case I was hearing is you could put like a box or you could, if you’re wanna literally assemble something, you can be, you know, a tent. And then the components are, you know, the the canopy for it, the different rods for it, the zipper. And then those items are not sold otherwise. But you can make the work order and actually pre-build this tent. Excellent, so once this is created, you have your assembly SKU, it’s good to go. You will be able to search for assembly SKUs that you created from your inventory page, go to is assembly, yes. And it will filter and show you any of the other SKU that you had created this, you can turn, say you build a work order, you’re done with it and now you want to make it a kit. You can do that but you’d have to un, you have to remove the assembly components, uncheck it and now you can make it a kit, that kind of thing. But you have to make sure the quantity is zero if you’re gonna be doing that ’cause kits can’t have any on hand.
So you wanna be cautious if you’re gonna be switching back and forth, definitely reach out for support before doing too many changes on that one but you are able to modify it later on. Okay, so we created our assembly SKU. Let’s get to making our work order. So going back to our dashboard on our top right here, we gotta create work order. And now you’re going to follow a step by step. So to guide for creating it, if you have multiple warehouses, you’ll be asked to choose a warehouse. You do need to make sure you have permissions to access the warehouses, which we just saw I did not, so let me go address my permission. It does check your allowed warehouses and all of that, which will make sure a user who is not supposed to be using that warehouse does not have access to that warehouse.
Makes sense.
All right, so choose your warehouse and this is your requested date. So this is when would I like this work order done by, when do I need these yoga kits sent out? So I would like them done by the end of this month. Now I can name this, you could be as specific as you would like. So my yoga box and this is a restock that I’m sending to some big box store that we will not name. And then you have your option for assembly work order and custom Work Order. So I wanna briefly touch upon custom Work Order. We won’t go through that fully cause it’s pretty straightforward. But for custom Work Orders, what you can do is upload just instructions like a note if you want to track your team like move sort of inventory or cycle count a certain item and you just kind of wanna upload it and then your team knows to go then and make that cycle count, you can upload instructions, you also can upload attachments. So if you have some sort of tasks that you would like them to do, we support a lot of different types. We support PDF, doc, PowerPoint, Excel, we also support MP4 as well. So you can upload a little video with instructions if you want them to do some sort of task and you need to put the instructions there. You can pretty much submit this all in ShipHero.
So that’s a, the custom workflow. And then you would create this and it would pretty much just have the task and then you can just mark it as done. But we’re going to focus on the assembly work order ’cause a little bit more interesting and has a few more extra steps for the assembly Work Order. You’ll have to choose which kit are we building here. So we see we have our yoga starter box, these are our items. It’s showing you how many of these I have available and we are going to choose that. And then you’ll see here there’s a configuration. So we know already that you need two blocks per box, one of these, one of these, that’s already stored. This is more for internal use if you have some sort of code you would like to use or some sort of special packaging, any sort of extra note, it’s completely optional but you can put that in and this will show you, I’ll show you later where you can find this information. And then you’ll be asked how many you would like to create. So we see here how many we have available. What’s good to note is if you are, you can make your Work Orders in advanced, so if you know, maybe you don’t have enough yoga mats yet but you have a PO coming in, you can pre-make this. It will let you proceed if you go above this number in terms of creating it, but you won’t be able to build it until you actually have the items. But this is giving you a guideline of what you actually have available and as you’ll see here, I put that we’re gonna create 50 of these since we need two. This defaulted that, I’m gonna have to pick a hundred of these, 50 of these and 50 of these and that is all set. Once you’re done, hit continue. And then similar to the custom one, you’ll now be able to put in notes, packing details, any specific instructions that you would like, place. And if you’re assembling, as I mentioned earlier in my our strange tent example, you could put certain instructions for the assembly if you would like. These are optional though, you do not need to put anything here. And then you can do attachments, so if this is a work order, you might be requesting a lot. It may be easier to have all your instructions saved and like a PDF of sorts and that way you could just upload it and all of the instructions are there and if it’s something more complex, you can put pictures of what it should look like done. Especially if this is for maybe a client that has very specific requirements, you know they want the label faced up and they want it placed. You can put a picture of exactly what it should look like and that way your team can reference it. The attachments will be very useful for cases like that. But again, it’s optional.
You don’t have to do attachments if you don’t want. So we went through each of our steps, then we hit create work order, all right, work order created and it shows right up on top of my list here, my yoga starter box. Currently I got no schedule date because that comes in a bit later and it shows right up on the top of my list. So now I’ll come in, I’ll see what Work Orders I have. You can look at the schedule date, see which ones you wanna focus on. We’re gonna take a look at our new one. So we’re gonna click in here and we could set an internal schedule date, you know, looking at everyone’s shifts when we’re gonna have some work to go pick all of these, when do we wanna start this? This date’s internal, you don’t have to set a schedule date, it’s just there for you for scheduling purposes. Some people may have a lot of Work Orders coming in and you’re gonna wanna prioritize them. And of course you could set some as like by just priority. But this helps you schedule. Okay, we’re gonna work on this one on Wednesday and we’ll start this one on Thursday. It’s just an option, so set a scheduled date and we’ll look over, we have a lot of different, a lot of information here. So you’re gonna see how many kits you need to create, how many items, different items per kit, how many total items you need to pick, that configuration previously, if I had typed something it would be over here, your kit requirements. The two yoga blocks for the one for the one is always visible here so they can refer back to that. How many you are building, these barcodes are for your yoga starter box. When it’s completed you’ll be able to print those out. You can assign pickers and packers just to track who was working on this here, you can add additional attachments, add additional notes, for 3PL accounts that are linked to billing, they can add charges that will then go to 3PL billing. As a brand account, you can use this to simply track how many man hours you spent and how much time. This doesn’t currently link to a specific billing, but it’s visible for you to see if you wanna just internally track how much time, you’ll see your instructions and then a timeline which tracks all of the progress done on your work order. So for Work Orders we have some steps. So in progress it’s sort of like a pending, you haven’t moved anything yet, you haven’t picked anything yet, but you’re reviewing it, you set your schedule date, you’re gonna get to it.
But once you’re ready to pick it, we wanna update our status to ready to pick. You could leave a note, this is totally optional. You could put, you know so-and-so is, you know, is ready to pick or anything, everything is logged in the timeline. This is just for additional information as you’ll see here. It was me who moved this to our ready to fix status. So on the kit view here you can see that the amount to create is actually editable. This is intentional in case you realize while making this, you need to make more than you thought, or perhaps you didn’t have as many on hand as you thought you did or some something came up and you realize, nope, we’re not making 50 of these right now, I wanna edit that. That’s completely fine. What you would do here then is simply update the amount that you would like to create, which will then update the amounts you need to pick for each of the SKU and then we’ll hit save. And now you only need to make 25. You’ll see it updates here, but don’t worry, this is all updated in the timeline. You’ll see that the items were updated and now we’re going to get ready to pick these, so we have 50 of our blocks. We need to tell ShipHero where are we picking these from. So we’ll go to the assign and it’ll show us all the locations that have this item. None of our locations have 50, which is okay, we can choose multiple locations, we’ll hit add. And then we want to tell the system how many we’re taking from each of these locations. The reason this is useful is there might be a situation where you’re gonna wanna empty out certain locations, not actually use everything in another one. It’s not always that you’re going to be nice and clean with the 25 and 25. This allows you to take a few from a location that has more and then maybe pick from several locations that have three and four and just kind of combine them. It’s designed to be flexible. That way you can either pick everything from one location or pick them from multiple locations, whatever works for you. And then we’ll do the same for our yoga mat here, we’ll just go with one location for this one, we’ll choose for this. All right and we also need to choose a staging area. So what’s a staging area?
So the idea for Work Orders is we’ll pick all the components and now we need to move them. We’re gonna do an inventory transfer and put them somewhere where no one else can touch them. The idea is these components are now being used to build these Work Orders. So we don’t want anyone picking these components, we don’t want them being used for replenishments. We also don’t want them being sold really anymore as individuals ’cause they’re now gonna be part of this box. So we wanna move them to a location, a staging area that’s not pickable, it’s not replenishable and it’s not sellable. So all of these will be there, they shouldn’t be touched. Now we can use them to build our assembly SKU. So that’s what we wanna choose for a staging area. So I mentioned these locations are special, so let’s take a quick look at what that might look like. So when you’re using Work Orders, you may want to look into creating a staging area. Now you don’t have to, this can technically be any sort of location, but for this purpose it’s good to see what a staging location would be. So we’re gonna do this as staging location A. We’re gonna make it not pickable, it’s not sellable and we’ll just save that as that. And then we also wanna make it so you can’t replenish from it, so we have a sitting here, do not replenish from, and if you check that off, it won’t show on the replenish report. So everything here should not be touched. So what we’ll do is we will now go in and assign this at staging A. All right, we’ll hit save. Okay, so once we choose our locations, we have our staging area, you’ll be able to print your picking sheet which will show you the location, your quantity to pick. And now you’ll send someone out to go gather or send multiple people out to go gather these items and bring them over to your staging area once you have everything. And this can be modified still at this point. So if they go over to A5 and we think there’s 25 and you get there and you realize, ah, there wasn’t 25, you can change this location or add another location and be like okay we got the 20 that was here. That’s why this being editable is very useful ’cause you can tell us, okay, we actually only took 20 from here and that’s fine. And then you could add another location that had the remaining five, at this point this is all still editable, but before you move to the next step, you wanna make sure this is accurate ’cause we move to mark as assembly, what’s gonna happen is ShipHero will deduct everything that you picked from these locations, so 25, 25, all of this will be deducted and it’s all gonna be moved inventory transfer to this new location. Now this is logged in your inventory logs, you will see that these movements were done. This is just moving everything over for you and now that it shouldn’t be touched, so this was accurate. We’re ready to move this over to staging. We’re gonna mark this as assembly in progress. So we’ll click here. Again, optional note, you can be like confirmed by manager, everything is accurate or something like that and they could sign off on it, but it’s optional. All right, now we’re in assembly in progress. So at this point these have already been deducted.
So if you go and check these locations, this will show that it’s not there anymore. If you check the inventory logs, this will show that this was deducted and now everything is here. Someone goes up to the staging area. If you have a barcode in that area and they scan it, you’ll see everything that should be there. So it’s all tracked, everything’s accounted for. And now you’re gonna start building these. So here you would look at your kit requirements, you know, download any of those attachments that you may have had, look at your instructions and start assembling this. As these are put together and it doesn’t have to be at once. You can start receiving them. Now you’re receiving the completed box. This is my two yoga blocks, my mat, strap altogether and now we’re going to go put that somewhere. So we wanna mark a receiving area. So you have a few options, you’re receiving area could be a pickable bin, you know, I built these first five, we’re still working on the other 20, but I built the first five and I wanna put these in a pickable bin so we could start shipping them. You know, maybe orders already need them, so we wanna put these directly in a pickable bin, that’s fine. This area could also be like a transfer location, which is sort of like a cart, in which case you could put them there and then someone else can now go take that cart and go put them in a different location depending on how big your warehouse is. But this can be a pickable, sellable location ’cause now we want to sell these completed yoga boxes.
So we’re going to choose a location here, for this example, I’m gonna go with one of my transfer locations ’cause I’m gonna build these, put these on a cart, I’m gonna hit save and now we’re gonna receive these five. So once we hit this button here, what’s gonna happen is all of these components are gonna be deducted from staging, we no longer have them, they’re now part of this other SKU and the yoga, fully yoga starter box is gonna be received. So we’re gonna do a transfer and there you’ll have it. We updated our first five and now if we go to our yoga box, which previously it didn’t have any, we see that we have our five on hand. If you go to our bins, you will see that we have them in our transfer, everything’s being tracked. And then if we check our components, let’s say our yoga block for example, I know some people love every, always wanna make sure everything is tracked. So we wanna just show that. All right, our yoga block, you’ll see here it got moves to staging, how many, since two per box, that’s why it was deducted by 10. You’ll see the movement of 25 from these two locations being moved here. So the whole transaction is logged as well as if you go to your inventory change log, you will also see all the movements. So to your transfer location, everything from staging, all of those movements are all tracked so you can continue building these. Great thing is you don’t have to do it all at once. So I can build some here, be like, okay, good for today, goes back, you see that it’s in assembly in progress, I can move over to a different one, okay, I’ve done 10 of these. I wanna keep now packing my winter set and someone, you can work on these, it’s very flexible. You don’t have to do them all at once. Some use cases I’ve heard get mentioned is if you wanted to build like a thousand, you’re probably not gonna get all a thousand done in a day. So you could work on this over days, over weeks, it will just track it and then as you receive it, you can start selling it.
You don’t have to wait for all a thousand to be done, which is a huge perk. And then once you are done, you can mark this as done. So let’s show that, so we’re gonna do the remaining 40, transfer, you’ll see this goes green, it is done. If you try to do more than this, you will get an error because the transfer was already completed, also note, the staging area doesn’t have anything else in it right now ’cause we have now depleted it so it won’t let you do anymore. But this is now done and then you can hit mark as done. You can put a note, you don’t have to. Here you go. It is complete. Again, everything logged in the timeline and it’ll show as completed here, which will give you your last little mark here. And that is Work Orders from beginning to end, creating the assembly SKU, creating the work order, and then going through completion, that’ll make sense, Dano?
Awesome.
No, absolutely, absolutely. Super detailed, yeah, totally makes sense. Super intuitive as well.
Awesome, thank you.
No, thank you Val. And if you’d like to check out other feature walkthroughs, click on the top right corner right now and if you’re ready to unlock your eCommerce fulfillment superpowers, visit ShipHero.com to schedule a call with us. Thank you for watching and have a great day.
.jpg)
Discover how to streamline your shipping process and save on costs with ShipHero’s Bulk Ship feature.
Hear from Alex Lewkowict about why Bulk Ship is his favorite feature. By picking orders with the same SKU together, you can create all labels in one batch and set up an efficient assembly line in your warehouse. With steady consistency, our special projects team has shipped 3,000 orders in a single day.
Don’t miss out on the benefits of Bulk Ship – start maximizing your shipping potential today with ShipHero’s Warehouse Management System.
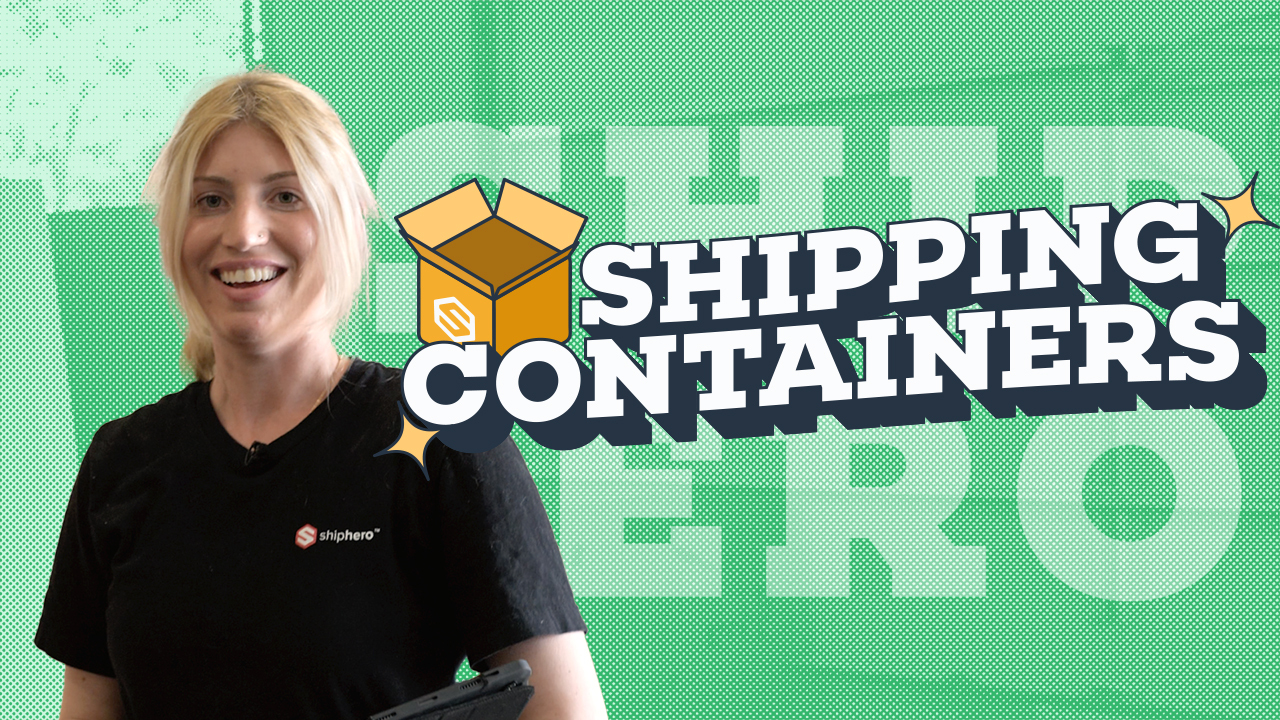
We’ve made it easier for your warehouse teams to sort packages into the right shipping containers and help eliminate the issue of “no first scan.” Now all the information you need to get packages to the correct carriers is available via a barcode scan in the mobile app. Available in the app now!
Hello, everyone. Val here at our West Palm Beach warehouse, I'm super excited to share with you our shipping container feature. What this feature allows you to do is sort packages that your Packers have packed into different containers for your carriers. What's great about the shipping container feature is it allows your packers to focus on packing. They pack their package, they put it into a cart like this. No need to sort at the pack station. When this is full, they roll it over to the section and someone with this shipping container on their mobile app, we'll just go through the process and sort for them before it goes out the door. So I'll take you through the process. It's super simple. What you'll do is you'll take in a first package, you'll scan and your tracking number and the mobile app will show you which of these containers to put it in. Then you just scan in your container based on what the app tells you. Drop it in and on to the next one. All sorted and ready to go out the door. When your carriers come, they simply pick up the containers and they are on their way. The shipping containers feature will provide you with the data as well as the peace of mind that your packages do make it to pickup. So give it a try. Let us know what you think and thank you for watching.
It’s here – ShipHero’s WMS now offers an end-to-end wholesale solution that makes it easy to pick and pack wholesale orders, and print freight and courier labels. This is the solution you’ve been looking for especially if your wholesale orders consist of a smaller number of SKUs and high volumes. We’ve also enabled QR code picking for Wholesale similar to our Bulk Ship feature. You can allocate your wholesale inventory and once the shipping labels are printed, it will be deducted from your system so there’s no chance of overselling.
Take a look at this video with our Product Manager Val as she walks you through our new wholesale courier flow.
- All right, hello everyone, this is Val here at ShipHero and I'm excited to show you. You normally do the introductions, dude. You gonna show the feature, right? - Yeah, exactly. It's the other way around. I'm gonna show the feature. Hello everyone and welcome to another episode of ShipHero Feature Walkthroughs. I'm joined today by Valerie Cancian, our Associate Product Manager. So how are you today, Val? - I'm very good, Danno. How are you today? - I'm good, I'm great. - Are you excited to see this feature? - I am excited, exactly. Yeah, that was exactly what I was going to say. - I read your mind. - What feature will be explored today, Val? Tell us about it. - We are gonna take a look at our Wholesale feature, specifically focus on our Courier flow. So the wholesale orders, our larger orders, going generally business to business, for example, to a big box store like Walmart, Target, Nordstrom, those kind of places. Doesn't have to be, you can use this flow for any larger order, but that's just an example, this is for B2B. This flow will take you through picking a wholesale order, packing, and then generating courier labels to ship out those boxes. Wholesale also has a Freight flow, but we're gonna focus on that for a different video, so stay tuned for that flow. But for today, we're gonna look specifically at our Courier flow. So we're gonna take you through creating a wholesale order, tagging orders as wholesale, and everything from there. So are you excited? - Awesome. Yeah, absolutely. - Awesome. All right, so let's take a look at setting up your wholesale orders. So step one, you need to mark your order as a wholesale order. So how would you do that? First, you need to make sure you toggle that order as Wholesale. So we have a new toggle where you can find when you go into an order, just in your Manage Order page and you open up your order, you'll see under Order Details, there is a Wholesale Order section, and you want to enable that little checkbox that will tell ShipHero, hey, I want this order to go through our Wholesale flow, which I'm going to show you. Now of course, you can go into every order and check this box and enable Wholesale Order each time, but who has time for that? We'd much rather automate this process. So what we suggest is creating an automation rule that as the orders are, they're created, so they're manually created in ShipHero or imported in from a store, that they will be set automatically as a wholesale order. So let's take a quick refresher on automation rules. You go to Order, Automation Rules, and I have an example set here. The key thing for this is you want your action to be Toggle Wholesale, automation rules run as the order imports. So anything that has one of these triggers will toggle the setting. Your trigger could be whatever works for you, it could be anything from a specific store, it could be, as in this example, an order of a certain quantity. So a larger order, you wanna send it through the Wholesale flow, that's fine, the trigger is up to you. The key point here is at the action is Toggle Wholesale. So this is on, your order comes in, it is flagged, and now you can send it through to the Wholesale flow. Another cool thing to note though before we kick off that flow is wholesale orders generally have unique requirements. Sometimes they may have special labels or additional documents. These may be sent in from your customer, or if this is a freight order, you might get that from the freight company. In order to attach those documents to this order so that you have it all organized, we added a section for Order Attachments, where you can upload these forms, these labels, have them here, and then when you open this order in the Wholesale page, you will have those attachments there so you can just print them out and include them with your order, nice and easy. So that's what this Attachment section is for, it was built in for this Wholesale flow. So we got our order in, we have our toggle on, we have any attachments we would like uploaded, and we are going to now take a look at the Wholesale flow. So you're gonna wanna go into shipping.shiphero over here, and then on your navigation bar under Shipping, you'll see a new section for Wholesale Orders. So when you click here, you'll see any and all orders that are currently toggled on for wholesale. So we're gonna take a look, we're gonna click into the one we wanna work on, and we'll see what we have here. So any attachments would have been on the right-hand side. You could attach additional files if you forget and need to attach some more. Up here, you'll see your picking plan, so these are all of the items that we need to pick for this order, as well as the quantity, and then we'll have a packing configuration and everything is logged here on your timeline. So any quantities have been changed, any flags that you set, you'll know who did it, when they did it, that is all tracked here in ShipHero. There are two options. So I mentioned for this video today, we're gonna take a look at Courier. We will have a video for Freight flow for those that are interested, but for today, this is specific to Courier. A thing to note, you want to make sure you set this before you start packing. There are certain differences between freight and courier, specifically the use of pallets. Freight will have pallets, courier is just boxes. So if you start packing in freight with the pallets and try to switch to courier, you will have to redo your packing layout. So we wanted to make sure we set this up front so that you don't have to redo anything later on. So we're gonna set this in as Courier. We have our order details here, and now picking. So picking, we actually offer a few options. So for this video today, we're gonna go through our generic flow where you're gonna pick the locations, print a pick list, and pack from there. However, we do have a very cool option where you can generate a QR code for picking. So for those that much rather this be on the mobile, you want that extra QA of making sure you're picking the right item, or you wanna go through a flow where you pick everything for wholesale and then move it to like, a staging, similar to what we do with work orders, generating a QR code like this, we'll pull all of these items up on your mobile, and then you can pick this. This is very cool and it deserves its own video. So we're going to do a walkthrough of this entire flow in a separate video, but for today, for this video, we're gonna go through the manual for those that maybe don't have, just don't want to have more iPads or something and you'd rather just go through generating a pick list. We like to offer multiple options, so we're gonna go through that flow. But if you're interested in the mobile, we got you covered, just stay tuned. So going through the pick list option, I can't generate my pick list until I choose my location, so that's why this is currently grayed out. You'll see I need 25 of all of these items. So I'm gonna go in and assign some locations. So we have a few options here. As you'll see, you could sort these locations by most stock, least stock, first in, first out, first expired, first out, last in, first out, last expired, first out, any option, the way you want these locations ordered, you can sort them here. I know some people like to empty out locations with less stock in first, so you can sort that way, and then choose locations to fulfill your 25. So for example here, this one has 20 available, so I'll start with that. That will empty out the 20 and I still have 5 more, and then I'll pick a second location, and that's how we'll do this, so 20 and then 5 from here. We'll save those, as you'll see, 20 and 5, but for those that maybe you rather go to less locations, so you wanna go to those with most stock first. You could sort by most stock, and then, I mean, you can pick directly from receiving. I've actually heard use cases for this where the order is pending and you're waiting to be received and they don't even want to, why waste time putting it away? So that's why we do allow receiving. If you're seeing it here and you're like, "Why is it there?" There's a use case that some do want to pick directly from receiving. They received it in and they wanted to go straight to this wholesale order, so it could go out the door. So we can pull the 25 straight from there. You'll see anything that is marked overstock. A big thing with wholesale orders, which I'm sure some of you are thinking now that you're seeing overstock, is wholesale orders tend to be large quantities, and when you go through the regular pick flow, you only can go to pickable bins. And since you can only go through pickable bins, these large wholesale orders tend to back up this process, as well as your regular direct-to-consumer orders. So with the Wholesale flow, these are now pulled aside, and they could be picked directly from a non-pickable bin. You don't need to replenish them, you don't need to waste time depleting your pickable bins for a wholesale order and then having to replenish everything back in so that the rest of your orders, no, no, no, you could go straight to an overstock location and pick directly from there. So that's why you seeing here that we are letting you pick from overstock. This was intentional, this was to save time, both in replenishing and then not backing up your queue for your other pickable orders. Another thing to note on replenishment, if you are using a Replenishment Mobile, shameless plug here, it does take into account wholesale orders and will filter out those, that you're not stuck replenishing them, if you want to. If you're using the appdot, it doesn't do that. Just a heads up. We built the new replenishment to take these into account. Okay, so we'll keep going through our locations. So in this example you're seeing, we have lock codes, so I know everyone likes to get the first expired out, so we have a filter for that. It'll show the ones that are expiring first up on top. So we can take these. Now a thing to note that this came up, we need 25, and currently, only have 10 available for this lock code. For orders, generally, we like to keep one lock code per order. So in this case, I'm actually going to take this one here since we have enough, that way we're not mixing any lock codes, it's just a thing to do. That's why we do show those, so you can see that. All right, we'll keep going through this process. So background music, Danno. ♪ Doo, doo, doo ♪ And then we do have cases. So Cases here, this is another feature that some might be familiar with, which is our Product Case feature, which is essentially, if you think you have, let's go with like cans of soda, you could sell one can or a six pack of that soda. So it'd be a case of six. In this case, we're doing our water bottles, so we have one water bottle or a case of six water bottles. These six are being picked as one unit, one whole case, and then they're being packed together. So this is going to be picking a case of six. We could do a separate video all on product cases, but if something is a case, you will see here, the unit of measure, case of six, and we will have a badge that calls it out as a case. Just so you are aware, you want to grab a full case of these. So we will grab our last location here. Okay, so now all of our locations are selected. You'll see the little green check marks. So key thing to note here, once you are choosing the location, once that location is selected, this order is now allocated to that location, meaning other orders cannot be allocated to that location. For overstock or non-pickable bins, usually not too much competition for those, even though I believe work orders can also be pulled from non-pickable bins. But at this point, these orders are now allocated. So this inventory is being held for this order. So a good thing to note for that. And you'll see that you can now print your picking sheet. We will show you what that looks like. So here is your picking sheet. You'll get your order number, your order details, any specific instructions, who our picker is when I printed this out, and then you'll get your picking list. So you have your barcodes here if you do want to confirm that you're picking the right item, the location you're going to, which lot you are looking for, an expiration to make sure it's the right one, and of course, the quantity. So you could take this printout and go pick these items, similar to what the Bulk Ship flow is with picking items. And once you have all of these, you bring them over to where you're going to be packing in your pack station, and we will go through our packing configuration. So for packing, we're gonna have to use our imaginations a little bit. So imagine, you know, you're in your warehouse, you just brought in all of these yoga mats, all these shirts, all these snacks, you got water bottles, tote bags, cases, all of your stuff around, and now you wanna start packing them into boxes. We do have a little bit of a manual process. To start off, you want your box, you wanna label your number of boxes so you can match your box to your labels when you start generating them. That's what this notification here is, that you have to label your boxes. First step is we're gonna add our first box. So this is a courier order, so we're just adding boxes. If this were freight, we would be adding a pallet. So you choose which box you would like to go with, I have wholesale-specific boxes. The dimensions will autofill and the weight will automatically fill in, as well, for your boxes, and if you do have the weights stored for your items, it will automatically increase, as well. We do support scales, of course. In that case, just make sure you click over the weight and it will update the weight for you if you use scales. But if you have, maybe you don't have a scale, as long as you have the weights of the items stored, then these will be okay. And if you don't have the weights of the item stored, we have a feature, FAI, that will tell you to update them as you go into receiving. I'm just plugging things all day today. I can't help it. The thing with the Wholesale feature does link in with everything, so you just gotta do it. Okay, so we got Box 1. So a few little things to note here. You see these little icons here, if you use Bulk Ship, they're probably familiar to you. This will be when you generate labels, one when it's generated, one when it is printed. These are not filled in yet, 'cause we didn't get there yet. You can add items two different ways. For those of you that prefer keep things nice, easy, manual, you could click Add an Item, you'll see your different items here, and then you choose which one you would like to pack, and just fill this in. This is useful, I find, if you're gonna have a lot of boxes, because wholesale orders could be massive, they could be hundreds of line items. And if you know you're gonna have 50 boxes all with 10 of the same item, it might be okay to just sort of choose the item and put in the quantity. I know some of you are cringing out there going, "No, scan everything." Okay, that's fine, we do support scanning, so you can manually input an item, and the quantity, as you saw here, the weight updated automatically. But for those of you that like your QA, I hear you, I get it. What we could do instead is we can have you scan in the items. So key thing to note when you scan in though, just make sure you're highlighted over the correct box. This way, the system knows which box you're scanning these items into. Otherwise, it won't know, and we can just start scanning in some items. So see here, let me scroll down a little bit so it's a little bit more clear for you. Okay. It'll just be increasing, I just scan a different item, and then you just, you know, have fun, just keep doing this. Literally, I've seen, with wholesale orders, often, and I don't know if it's like a retailer requirement, they'll usually have the same SKU in one box and not really mix it up like this. But for the sake of this demo, I was gonna mix it up. And I'm sure someone out there is like, "No. That's not how that how that goes." So we're just gonna keep packing our items. And the thing with wholesale is orders, I'll pack them all each, since it's now isolated, again, it's not backing up your queue, it's not holding up where you would normally be packing your multi-item batch pick orders, so those could just keep going while you could have someone or a team of someones working on these orders and just packing them all up. If you add a box by mistake, you can always delete it. You also could delete an item if you decide you did not want to mix different SKUs in that box, you can always delete it and put it in another box. Just be careful, what you're doing in reality is matching what the computer thinks it is, 'cause when we generate the labels, we wanna make sure the weights are correct and everything is matching. So make sure we know what's actually happening. I'll mix it up, I'll do a little few more scans, just 'cause. I was gonna see how many of these scans I could do before Danno's like, "Okay, the beeping is getting to me." All right, we'll go through these. So this is not best practice, do not do this at home, but I'm going to just update these. Once you reach the max, it will stop you from putting more. So for example, this tote bag, we needed 25. As you can see, it won't let me add more, and if I try to scan in more, it won't add any more. So we'll cut you off at the amount that the order needs. So let's pack all of these and I do want to show you for cases, so cases are interesting, 'cause sometimes they are a box in and of themselves. It will, for the sake of keeping things consistent for the courier order, we do ask that a box is selected, even if you're just gonna put cases in it, you could make a case-specific box or something if that helps work with your flow a little bit better. There are times the cases are small and you can put multiple cases in boxes, so we needed to offer that alternative. But if you wanna just put a case directly, you kind of need like, just a box there to hold the spot. For freight orders, which again, will be another video, you could put the case directly on the pallet. A little bit different there, but we'll just put our cases direct here. Okay. All right, so you know I haven't packed everything yet, 'cause it won't let me generate my labels yet. Let's add another box, and we have just our snacks left. All right, there we go. So our Generate Labels is now visible, and we are ready to generate labels. So at this point, everything's in its boxes, we've been hopefully remembering to label our box, Box 1, Box 2, Box 3, Box 4, and now we're gonna generate labels. So a few things to note before I generate these. Wholesale orders do need to be mapped directly to a carrier end method. We currently don't support cheapest quoting for wholesale. There's a lot of boxes, they can be different weights, different sizes, cheapest can send them all over the place. At this point in time, we ask that they be directly mapped to a specific carrier. So you know, UPS Ground, USPS Priority, however that is. This mapping is what you will see in appdot when you go to your shipping information. That is the carrier that we'd be using, and the shipping method, if you need to update it, this would actually be done in appdot currently. So you could go here to edit your shipping information, but just the thing to note, cheapest isn't currently supported. But as long as this is mapped, you can then go ahead and generate your labels, so we'll go and do that. If you have a lot of boxes, this can take a few minutes. We have to call the carrier, get the invoice back, and then start generating all the labels. So it may take a few minutes to finish, but don't worry, we'll get all the labels for you. In the event that something may have gone wrong, be a little red icon, which I'll show you under the Label Summary. Usually, it's like a scene, might throw an error, in which case, you can split things up to make sure you get underneath whatever the weight requirement is or perhaps maybe the carrier didn't like the box that you were using. If that does happen, you could always edit your packing configuration, and then this will say up here, Reprocess Labels, and then you could just reprocess it. In our Help doc, we'll have images of what that looks like. But here, they generated, it'll tell you when they generated, and then you can print your labels. So you go right up on top here, it'll print the labels, it will generate these as a PDF. Labels here, and as you'll see, you'll say like, Box 1 up on top, hence why we're asking it to label. And this will, regardless of what carrier you use, we include that portion. So you'll see all of your labels and you could print these out, put them on your boxes, and out the door this order goes. You could reprint the labels if you need to, but at this point, we got one wholesale order done, many more to go. And that is your picking and packing and label generation for wholesale orders. And when you go back here, the order is now fulfilled, so it is not in our list anymore. And we'll refresh our page here just to show you, everything is fulfilled, order is fulfilled, and your labels, if you do need to reprint them for any reason, they are available here. If you do need to void a label, you can do so in appdot. So you'd come to your order page and you can void your labels here. If you do need to reship the order, that can also be done just like a regular order, come into appdot, and then you can hit Reship here and that will allow you to reship this order in case you need to do that. So that's the end-to-end flow. Any questions, Danno? - No, no, no. Absolutely not. It's easy, simple. - Put you on the spot. Yeah, no. But as usual, it's super intuitive and easy. - Thank you so much for your time today. - No, no, thank you, Val, for enlightening us on how this all works. It's amazing, really. - Awesome. Well definitely give it a try and let us know what you think. - That's right. If you'd like to check out other feature walkthroughs, click on the top-right corner right now. And if you're ready to unlock your eCommerce fulfillment superpowers, visit shiphero.com to schedule a call with us. Thank you for watching and have a great day.
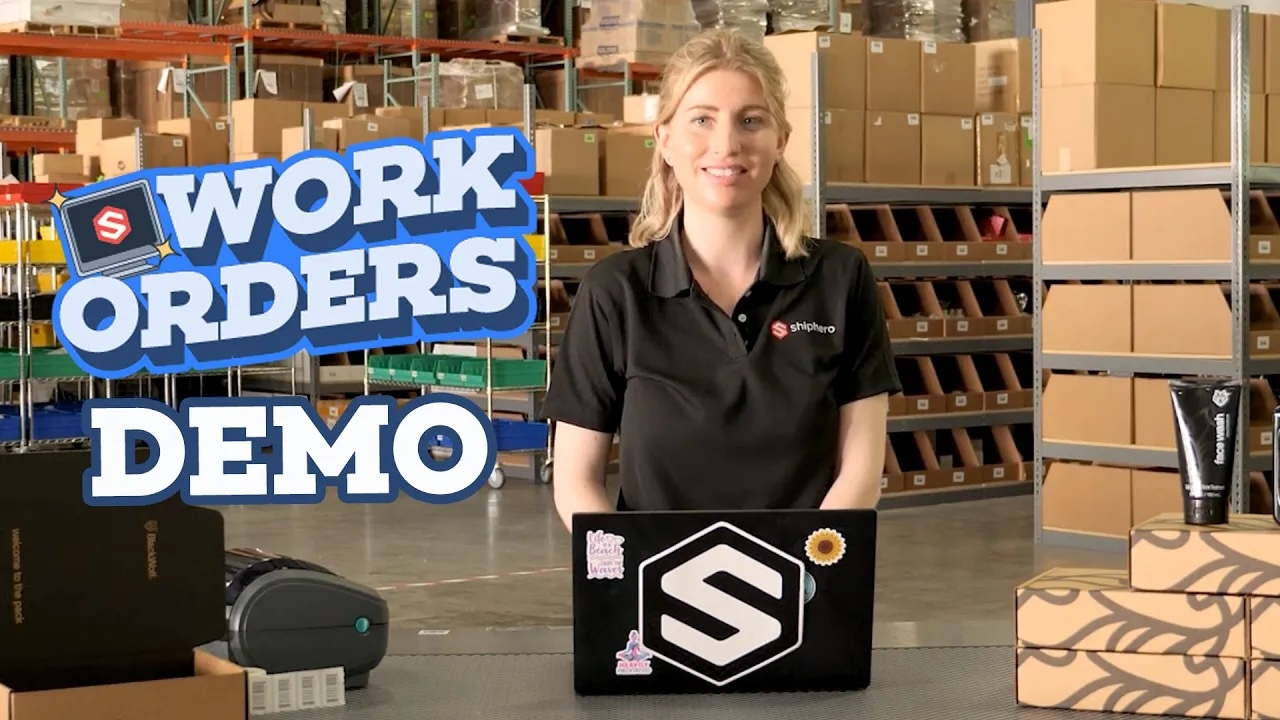
How much time does your warehouse team spend on Pre-Kit Assembly? If you do any FBA work, chances are there are projects happening all the time and it can be easy to lose track. With ShipHero WMS’ Work Orders features, pre-kit assembly is easy and efficient! Now, you can incorporate the entire pre-kit assembly workflow into ShipHero’s WMS and monitor progress, move inventory and get new products barcoded in a snap. For more details on Work Orders and how they can transform your warehouse ops, check out this video.
Hello, everyone. This is Val from ShipHero. I'm here today at our Palm Beach warehouse. In this warehouse we do a lot of prekitting, assembly, FBA prep, and I'm very excited to show you a feature we have out called Work Orders that will make this whole process a lot easier. With our Work Orders feature, you'll be able to upload a work order with instructions, attachments, images. You'll be able to print out barcodes for your custom SKU, your assembly SKU. You'll be able to track every step of your process through your timeline. You'll also be able to charge your clients straight through Work Orders with 3PL Billing. All right, now let's take a look at what this feature looks like in ShipHero. All right, let's take a look at creating a work order. As you'll see here, we are on our Work Order dashboard. From this page, you see a lot of useful information. You'll see any of your existing Work Orders, the warehouse. If you have multiple 3PLs, you'll see which 3PL was assigned. You'll see the type of work order. For this version, we support two types of Work Orders, an assembly work order which is creating your kits, your FBA prep stock. We also offer a custom work order, which I'll show you later on in this demo, which allows for an uploading of instructions. It's pretty much a blank slate, allowing you to submit a request. You also see here the Requested date, the date that you would like this work order completed by; the Scheduled date, which is when the warehouse is set to work on this work order. This is great internally for working through a queue and determining which Work Orders you want to start and when and dividing up your workforce in order to complete that task. You'll also see, very quickly, the order status. You'll see which ones are in progress, which Work Orders are being picked, which ones are being assembled, as well as anything that is completed or canceled. Over in the Actions item, you'll see there's different icons. The first icon shows you when the work order was being picked, the next one when it was being assembled, and then when it was being completed. We support filters for the order status, so if you only want to see Work Orders that are in progress, that are active, you can set your filters to only show in progress Work Orders and hit Apply. And as you'll see, the canceled one is removed from the view. All right, now let's take a look at now creating a new work order. On the top right of your screen, there is a Create work order option, which will lead you to a very straightforward step-by-step guide of creating your work order. If you are a 3PL, Work Orders are created on the client level. The reason being is clients generally submit these Work Orders to their 3PL for the work that they need done. If you're a brand account, you would create your own Work Orders and this first step would be omitted. In this demo, we're taking a look at the 3PL flow. So in this case, I'm the client, and I'm gonna be submitting a work order to my warehouse for some SKU that I need built. So first, I'll choose which 3PL I would like to work on this work order, then which warehouse I would like them built out of, and then the requested date. So for example, if this work order was needed for a restock at a big retailer by the end of the month, I would want all of these assembled before that end of the month. After choosing your requested date, you'll be able to select Continue, and it'll ask you for a work order name, as well as a work order type. For this example, we're going to take a look at an FBA prep work order. This is an assembly work order type because we're going to be putting together these SKUs for the FBA. After naming your work order and choosing your work order type, select Continue. This will bring you to your Select item page. When you choose this Select kit option, you will see your different assembly kits. Each work order can have one assembly kit. When you expand each kit, you'll see the different components needed for this SKU, as well as their on hand. For this example, we're going to build the first assembly SKU on top, so I'll select that, hit Select. Then I'll be asked how many of these I would like to create. You'll be able to see your on hand, which will give you a good guide on how many you can build. For this example, we're going to build 100 of these SKU. There's an optional configuration. This can be, for example, one body wash, one face wash per kit. This will also be visible on the next page, but it's a good option for a note if you need any sort of special configuration for this work order. After hitting Continue, you'll be prompted for additional instructions. These can be packing details, as well as specific assembly details. Packing details can be including filler paper or special tape. Assembly can be as detailed as you would like it to be or these fields can also remain blank. We'll type in an example together, though. (gentle upbeat music) If typing's not really your style, as you'll see on the next page, you can also upload attachments. This is great, especially if this is a work order that you may do more than once. You can have all of the instructions saved in a file. You can have a PDF with pictures of how you would like this assembled. You can upload a picture of the box assembled as a reference of what it should look like when it's done. You can upload labels, or a special barcode, or an extra insert. Anything that you may need for this work order, you can add as an attachment here. Don't worry if you forget any, you can add attachments again later, which I will show you later in our demo, but this is a great option to upload those instructions that you don't need to type them out in the earlier stage. When you're done, select Create work order. This will send your work order to your 3PL. Your 3PL will then be able to review it and then determine if this is something that they are going to assemble. So hit Create work order. Work order created. All right. Now, we're gonna move forward to the 3PL side. Okay, we are now in our 3PL account. This is what your warehouse manager will see. When they come in, they'll see their Work Orders, they'll see the statuses, and anything that's new, and as it's awaiting approval, will also be highlighted. The work order that we just created previously is this one down here for our FBA prep restock. As you can see, it's awaiting approval with a requested date at the end of this month. So we're gonna click into that. (gentle upbeat music) From here, you're gonna get an overview of your work order. You'll see what they are requesting, how many kits, the kit requirements, how many of each component per kit is visible. You'll see any instructions that they included, as well as any attachments. You'll see the timeline for when this work order was created. You'll see the requested date. And as you can see here, you can also add your own attachments. After reviewing, if this is something that your warehouse as the time in the workforce that they can tackle it, you can mark it as in progress, meaning you've approved this work order. When you mark it as in progress, you have the option to leave a note. This could be as simple as just saying that it's approved and putting the name. Everything is tracked in the timeline, so this is an optional field, but feel free to leave as many or as few notes as you would like. (gentle upbeat music) All right, so this is now in progress. Now, we realize Work Orders aren't always done right away. This is requested for the end of the month. Based on your workforce, though, you might not be able to start working on this for a few more days. That's why we have a Scheduled date option here. This Scheduled date is the date that your team can start working on this work order. This is an internal date for you to be able to prioritize when you wanna work on different Work Orders. It's very common that you're gonna have a lot of Work Orders requests coming in from different customers that need an FBA stock, they want a kit assembled, so you need a way to queue these up. The Scheduled date will help you do that. So for this example, we'll set our scheduled date. Hit Save. You'll be able to assign pickers, as well as your packers, to track who is working on this work order. As you see here, we have an option to add ad hoc charges. If you're a 3PL, this is gonna be a game-changer. Here, you're able to add a charge to bill your client for this work. When you hit Add new charge, you'll see that we have a few options here. You can bill per hour. You can bill per unit. This can be of the different components that you picked or the final assembly SKU. You can also put a bill for the whole work order. If we choose per hour, you can track how many men hours you spent working on this work order, as well as the rate. You can also add multiple charges, so you can bill per hour as well as per unit. (gentle upbeat music) And when your work order is complete, this will automatically sync to 3PL Billing, and you can charge your client. Going back to the main screen just to show the Scheduled date portion. When you are prioritizing which ones you would like to work on, you can see which of your scheduled dates is coming up and which work order you would like to start. We're gonna continue with our example. So let's say it's the next day and we are ready to pick this. We're going to now mark this work order as ready to pick. Again, you can add a note. This is optional. But a good note example could be starting, picking, or ready to move. All right, this is now in your Ready to pick status. The next step is to choose which location or locations that you would like to pick your components from. Over in this section, you'll see it says Assign. When you click Assign, you'll see all the locations that this component existed. Choose which location or locations that you would like to pick from. Hit Add, and complete this process for the rest of your components, (gentle music) and hit Save. Your To create quantity is set. However, we understand things happen. You may have a case where maybe you need to create some more or maybe the inventory wasn't what you thought it was and you need to create less. This, at this stage, your To create can be edited, in which case your pick quantity will automatically be adjusted as well. (gentle upbeat music) You also want to choose a staging location, so this is part of our work order feature and we think this will really streamline a lot of the process. What we'll do here is we're going to pick each component and then we're going to move everything to our new staging area. This is all done within ShipHero. All the inventory movements will be tracked, inventory will be deducted from the locations that it's picked from, and it will be moved to the new staging location. So let's choose a staging location. This location could be any location in your warehouse, though we generally suggest that it is a not pickable location. All right. We've selected our staging, our locations, our on hand is good, our amount in location. A thing to note about the In location here. This is taking into account allocations. Generally, large Work Orders will be picked from a non-pickable bin, which is supported. So other orders shouldn't really be allocated, but in the event there are other allocations, the in location, we'll take that into account and deduct that amount so you're not picking things that are already allocated to another order. Next, you're gonna wanna print your picking sheet. Here, you'll see your picking list, your location to pick from, your lot codes, your quantity, as well as a start time, and then off your team will go to go grab all of these items and move them over to staging. This can be edited at this point, again, at any time. In case while they're at that location, you need to switch the location, you can still do that. And you can reprint your pick sheet as needed. Once everything is on hand, you're going to want to mark this as Assembly in progress. This is a big step because this is what's gonna tell ShipHero, "We are deducting the amount that you picked, the 100 from each of these locations, and we are now moving all of this to the new staging location." Once you've picked your components, you're now gonna move this work order to Assembly in progress. This step is gonna deduct what you picked, so 100 of each of these components from the locations that you chose, and move it to your new staging area. So I'll be moving my body wash, my face wash, as well as my bags into our Project_Staging_2. This location is not replenishable, not pickable, and not sellable. All right, we'll hit Mark as assembly. Again, an optional note option. (gentle upbeat music) All right, as you can see, there's some changes now. At this point, the inventory has been moved, so everything here is now in your staging area. In the event that you need to put things back, it would be a process using our putaway, which is a separate feature. But for now, everything is in staging. Your team will go to your staging area and start to build these assembly SKUs. This is where the work outside ShipHero picks up because they're going to need to take their body wash, their face wash, put everything in the bag, and following the instructions. The team can download their attachments for any of the images they need to see. They can print out any sort of insert that they would need and they'll start putting these together. As they complete their kits, you will come into the system and you can mark as many as that has been built. You don't need to build them all at once. We realized this can take time. If you have to build thousands of kits, it may take you a week to build all of these. So as you finish each of your assembly kits, you'll mark how many were done, and then you can transfer them to a receiving area. So this receiving area, you have a lot of options. One use case could make this like a transfer location, like a cart, in which case you'll take your now completed SKU, put them there, and then you can go put them away into pickable locations. This receiving area can be the pickable location directly if you just wanna go drop these off where they can be picked. Once these are received, you can start selling them, you can start fulfilling orders. This SKU is done. What will happen is each of the components will be deducted from ShipHero out of the staging area all automatically, and then your completed assembly SKU quantity will increase by the amount sheet input here. So for our receiving area, we're just going to use a receiving location. Hit Save and hit Transfer to. This is going to move your completed assembly SKU and do the transfer for you. All right, as you'll see here, five of our 100 kits have been built. Obviously, a new kit is going to need a barcode that can all be done from the screen. You hit Print barcodes up on top, choose how many barcodes you would like, and hit Prints. Now you can barcode your assembly SKU and get those out the door. From this screen, you are still able to make edits. For example, if this work order was taking more time than you thought or the assembly was more complex and you wanted to add additional charges, you're still able to do that from this screen. Everything is being tracked. When we receive those five, it shows in the timeline. And you're able to make modifications to your date, your pickers, and your packers as needed. Once you're done with all of your assembly kits, you can mark your work order as Done. Once you have all done, you'll see that your counter turns green, meaning your work is done. You also see you'll no longer able to do any more transfers because we've completed all of our components in the staging area and we've finished our work order. At this point, simply hit Mark as done. You could leave a note, say maybe QA approved or a manager signed off that the work was done and hit Mark as done. Your work order will now show as Complete. That was creating a work order on the client end, as well as receiving and building our Work Orders on the 3PL end. If you have any questions or need any additional information on Work Orders, please check out our knowledge base. (gentle upbeat music)
Have you seen ShipHero’s amazing 3PL Client Portal yet? Get ready for an exclusive tour of our brand-new dashboard, designed to empower your customers with more control and convenience than ever before!
Experience how our dashboard simplifies the management of inbound shipments provides instant inventory updates, and streamlines order creation and consolidation, making it a breeze to process returns and access comprehensive reports.
Join us as we unveil how ShipHero’s 3PL Client Portal can supercharge efficiency and take customer satisfaction to new heights. Don’t forget to show us some love by liking, commenting, and subscribing for all the latest updates and in-depth walkthroughs of our newest features!
Are you fed up with inventory restocking causing slowdowns in your day-to-day operations?
Today, we’re going to talk about the advantages of using the Replenishment Min/Max system. This system is designed to enhance inventory levels, reduce restocking frequency, and simplify your ordering process.
Find out how adjusting the min/max settings in ShipHero’s dashboard can help you save money by minimizing the effort required for inventory control. And remember to subscribe for more handy inventory management tips and solutions!

.svg)


